

How To Repair Varnished Wood
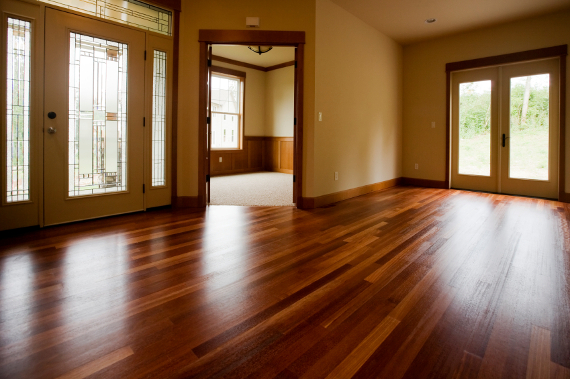
Using a quality floor varnish is a great mode of enhancing the natural grapheme and grain of wooden floors while protecting them from the general day-to-24-hour interval wear and tear of decorated environments. Cleaning and maintaining varnished floors with products specifically formulated for this purpose can assistance to keep them in tip-meridian condition for many years to come.
On the other manus while extremely tough, wooden floor varnishes aren't indestructible. Luckily there's plenty you tin exercise to maintain that cute end, whether it's a clear matt, satin, gloss or mayhap fifty-fifty a tinted or coloured floor varnish.
Does your existent wooden floor have patches of damaged varnish that are making information technology look tatty, crude and worn in places, or all over? Here'due south some advice on how to improve the appearance of these troublesome areas…
Mutual bug with a varnished floor
We see it all, but the near mutual real wood finish, varnish-related issues we hear about are localised patches of wear, where chairs with wheels, castors and hard legs have worn the varnish thin. Sometimes the vesture is and so heavy it takes off the varnish altogether, right downwardly to the bare wood, particularly around desks and tables. Excessive wear almost outside doors – your front door, back door, kitchen door and patio doors – is likewise common.
How does it happen? Minor particles of dust, dirt and other annoying materials brought in from the outdoors by the wind, pets and people's anxiety slowly wear away the varnish in these high traffic areas, not unlike sandpaper. You might besides find damage to forest flooring varnish happens when something heavy or sharp is dropped, which fries or splits the flooring cease.
Can Forest Flooring Varnish Be Repaired?
There isn't a straightforward aye or no answer. It depends on the extent of the harm, the type of woods varnish being repaired and what yous expect from the result. We thought it'd exist useful to await at the issues and answer the most frequent questions our customers ask virtually repairing wooden floors with a varnish end.
Real woods flooring restoration Q&A
Q. What is the difference betwixt floor varnish and floor lacquer?
A. There'south no difference. They're one and the same thing. In the merchandise we usually call themlacquers, while the general public tend to call themvarnishes.
Q. How can I tell which type of existing flooring varnish I have?
A. It'south difficult to tell the difference between a h2o-based varnish for wood floors, solvent-based varnishes or oil-based floor varnish, specially by appearance lonely. When they're dry they look much the same, fifty-fifty to an skilful. Nearly modern varnishes from the last fifteen to xx years are probable to exist h2o-based. If the floor was varnished more than 20 years ago you tin probably assume information technology'southward an oil-based varnish. Water-based varnishes tend to give a clearer stop while some of the older oil-based varnishes had more than of a warm colour to them. Solvent-based varnishes are commonly used on article of furniture, applied with a spray gun because they dry so fast (usually within x – 15 minutes) and have a very stiff smell. This makes them difficult to utilise on big, bars areas like floors.
Q. If I practice accept a damaged area that I desire to repair, volition it blend in seamlessly with the surrounding varnish?
A. Wood floor restoration rarely delivers a completely invisible repair when you lot're working with varnish. The new varnish will probably have a different formula and things like age and natural colouration over time changes the advent of the original varnish blanket.
Wooden flooring repairs – When the varnish is partially worn
If the varnish is only partially worn, yous're in luck. It should be adequately straightforward to tackle and the repair will be less obvious than varnish that's worn right down to the bare forest.
- Stage i – Lightly sand the partially worn area with a 150 grit sandpaper, vacuum the sanded area to remove all traces of sanding dust and debris.
- Stage two – Utilize a thin coat of floor varnish similar Manns Extra Tough Flooring Varnish or Ronseal Diamond Difficult Flooring Varnish over the worn surface area, so let it dry.
Yous can accept this approach for the entire floor, onlyalways do a exam patch first in a corner to make sure the new floor varnish is compatible with the one-time finish. Exit it for 24 hours so scrape the surface with a thumbnail to test it has stuck fast to the original finish.
Woods floor repairs – When the varnish is worn abroad to the bare wood
When you need to tackle areas that have worn right through to the bare wood, the process is a piddling more complex. It'southward as well worth begetting in mind the final wooden floor restoration finish probably won't blend in as well as repairing a partially worn surface.
It helps to call back about the damaged expanse as a very shallow bowl, where the bare wooden flooring is the base of the bowl and the undamaged flooring surface surrounding the damaged area is the rim. The inside of the basin is crude and ridged and the uneven raised rim makes information technology wait like the crater of a volcano in miniature.
You demand to sand the damaged expanse smooth so you become a gradual transition between the bare forest and the undamaged surface. As you use each glaze of varnish during the repair process, yous're filling about a 3rd of the basin. By the third coat, the freshly applied varnish has filled the damaged expanse to the same level as the existing varnish finish.
- Stage 1 – The first stage is to gently sand the edge of the varnish from the blank wood surface area of the 'bowl' y'all've visualised to effectually 150mm beyond the edge of the bare patch. Use a fine 150 dust sandpaper to get a nice polish transition from the bare wood to the edge of the repair area. In that location shouldn't exist whatsoever trace of a lip or edge between the damaged and undamaged areas, and you'll be able to experience when you've got it right. Run your hand over the sanded area to check yous've sanded the border completely smooth.
- Stage 2 – Hoover or wipe the area carefully to remove all traces of sanding grit and debris.
- Phase 3 – Utilise a sparse coat of varnish, ideally with a small brush, to just the bare wood surface area for starters, overlapping the thinnest, sanded surface area of original varnish by 10mm or then.
- Stage 4 – Allow the varnish to dry thoroughly.
- Phase five – Gently rub the dry out cease with a fine 320 grit sandpaper to get rid of crude bits and particles (a process called de-nibbing) and then vacuum or wipe the expanse with a clean, dry out textile to remove all traces of sanding dust.
- Phase 6 – Utilize a second sparse coat of varnish from the eye of the repair only this time get as far as 100mm from the bare wood area, and about 50mm in from the undamaged floor surface area.
- Stage 7 – Let the finish dry thoroughly then gently de-nib the freshly coated area with a fine 320 dust sandpaper, then hoover or wipe the expanse to remove stray sanding grit.
- Stage eight – Apply a concluding coat thinly over the whole repair area upward to the point where the good varnish starts and overlapping the good floor surface past around 10mm.
What almost aiming for total wood floor repairs perfection?
Varnish repair and maintenance is part and parcel of most real wooden floor restoration projects. While you are unlikely to achieve perfection, the current trend for preserving a beautiful, interesting patina means flawlessness isn't every bit desirable as it was not so long ago, when we were all decorating in immaculate minimalist bazaar hotel style.
Wood is natural and flawed, every piece is unique and the wear and tear y'all and your family create contributes to the floor'due south beauty and personality. Taking care to maintain a varnished flooring and dealing with areas of wear and impairment apace means y'all'll preclude damaged areas from getting worse, extending the usability and enjoyment of wooden floors for longer, if not a lifetime.
Demand assist varnishing your wooden floor?
For more information about wooden floor varnish and its uses, contact our squad of resident experts who are always on hand to assist with project advice and product recommendations. Alternatively, see our floor finishes FAQ page which covers many of the most unremarkably asked questions about floor finishes.
We beloved to see earlier, during and later on photos of whatever wood finishing project. If you would like to share your projection pictures with the states and our followers, you can either send us some photos or share on our Facebook, Twitter, Pinterest or Instagram pages.
Other great blogs that discuss forest varnishes

How To Repair Varnished Wood,
Source: https://www.wood-finishes-direct.com/blog/wood-flooring-varnish-repair/
Posted by: hatchactim1991.blogspot.com
0 Response to "How To Repair Varnished Wood"
Post a Comment